Spark Gap
This part acts as a sort of crude semi-conductor. Without it,
the Tesla Coil could not function. Basically, when the capacitors
charge up enough, the air between the copper pipe pieces ionizes,
and the power surges through. This pulsing action occurs
extremely rapidly - that power is pumped into the primary coil
which sets up a large, powerful electromagnetic field. The
secondary coil picks it up, amplifying it in the process. I'll
write up a Theory of Operation section sometime.
For this section, you will need the following items:
1. A 4-inch long section of 5-inch diameter PVC pipe.
2. 7, 1-inch long sections of 3/4"
diameter copper pipe.
3. 7, 1/8" wide bolts with matching
hex nuts.
4. A 1/8" wide drill bit that can
drill through copper.
5. A 3/16" wide drill bit that can
drill through PVC.
6. A cooling fan with a high air flow. I used a 12VDC fan that
measured 4 11/16" x 4 11/16"
x 1"
7. Four of the same ring connectors that were used in the safety
gap.
I used the section of 5" PVC pipe for the main part of the spark gap.
Drill 1 hole in each copper pipe. A drill press is very useful
here. Use the 1/8" drill bit for these
holes. Make sure that the bolt fits snugly in the hole, and then
remove the bolt. You will then need to measure off 7 points on
the top of the PVC pipe. They need to be 1 1/4"
inches apart. Then, extend the lines straight down to the other
end of the pipe. Drill 1 hole on each line, using the 3/16"
drill bit. They should all be 1 inch from the end of the pipe.
Place the pipes against the inside of the PVC pipe, so that you
can place the bolts through both the PVC pipe, and the copper
pipes.
The fan you get must be sized so that it can be either attached
to the PVC pipe using mounting screws, or simply glued on. The
fan I used was too large to use mounting screws, so I used a ring
of hot glue. It must be attached at the end farthest from the
holes that you drilled. The fan you get must have high air flow.
The fan is used to blow out heat created by the spark gap. Mount
the fan so that the air flows up the pipe, then through the fan.
You will need to have some sort of base to set the unit on once
it is complete. It will need to be at least 1 1/2"
above the main base of the Tesla Coil. You can use any sort of
base that will allow air to flow freely through the pipe. I used
a square piece of wood with a hole and a reccession in the middle.
The spark gap could then be set in this hole. I attached pieces
of wood on two opposite sides of the square piece of wood. These
worked as legs. This design allowed air to flow freely up the
spark gap.
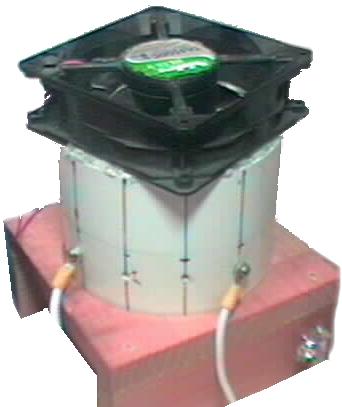
This is what the spark gap
will look like.
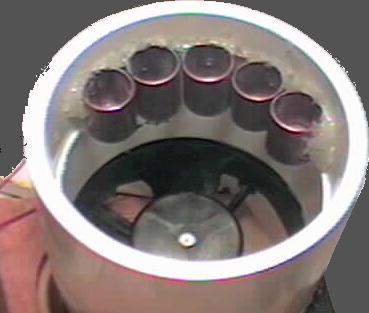
Another view of the
spark gap.
Cost of the Spark Gap
1. The 4-inch section of PVC pipe cost about $0.50
2. I bought a 5-foot section of copper pipe at a cost of $5.50. The leftover
piece will be used in the Grounding Section.
3. These bolts were $0.10 each.
4. The cooling fan cost $5.00 at Electronic Goldmine. The part
number is G7912.